How to Standardize Recipes for Consistent Plate Portions
Turn a home recipe into a repeatable production system with exact measurements, tested batch yields, reliable portion tools, and clear version control.
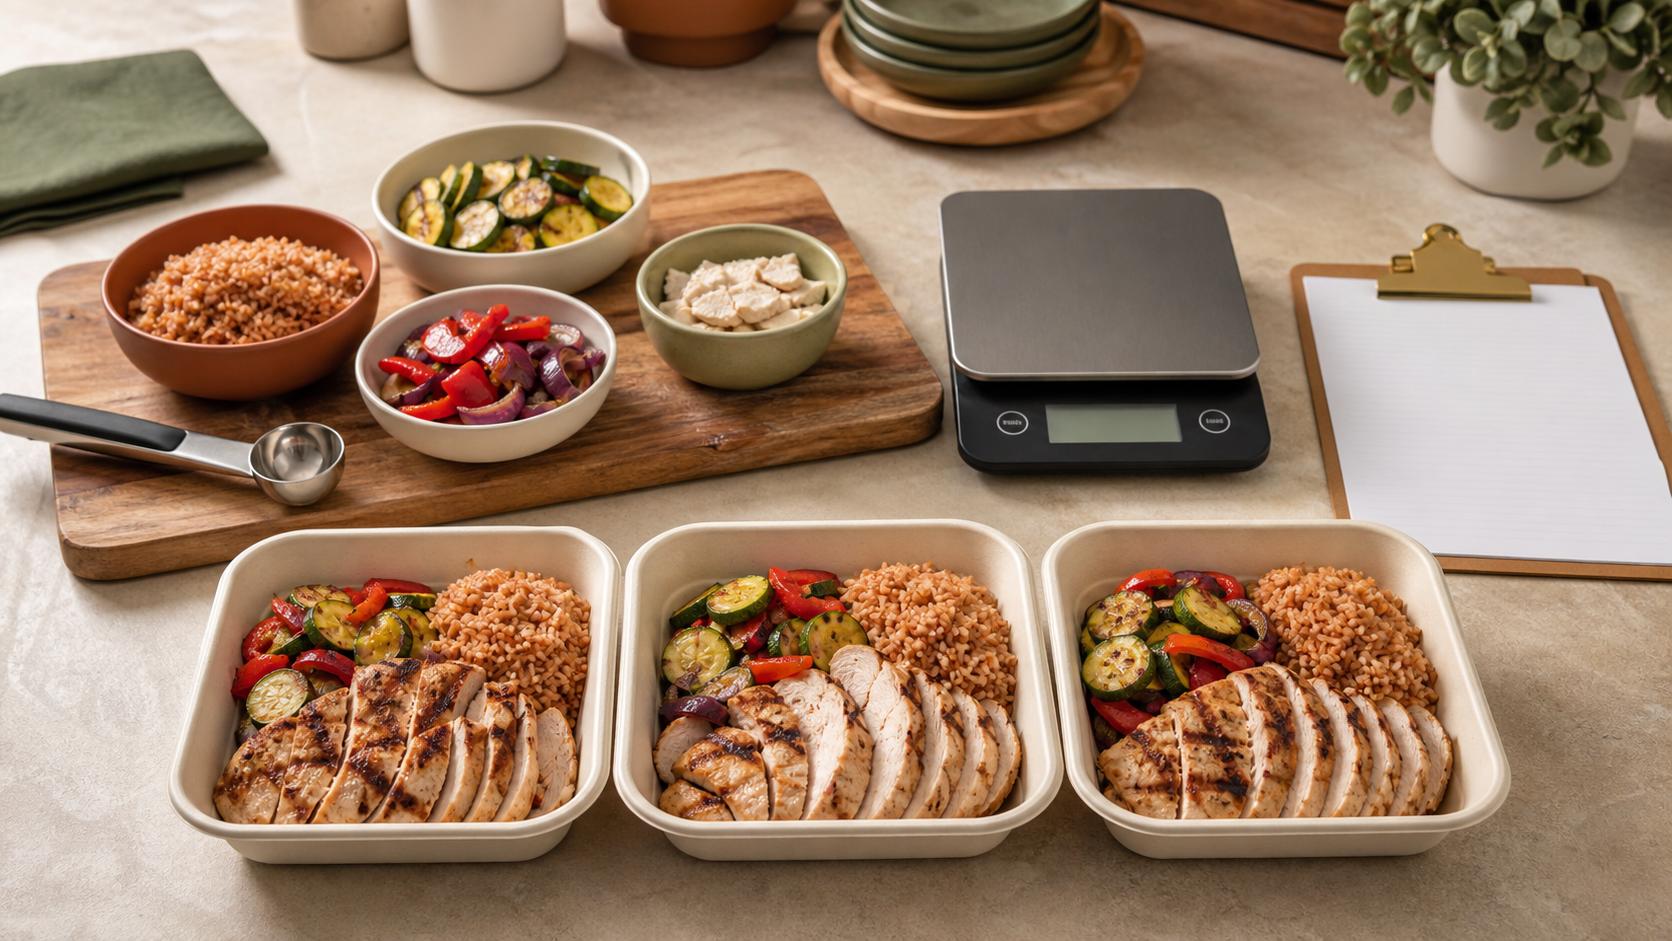
You know the dish by heart, but the numbers keep moving. One week the pan makes 24 full plates; the next week it makes 21. Portions shrink near the end, and the real cost per plate becomes impossible to trust.
A standardized recipe replaces that guesswork with a production record. This guide will help you document one menu item, measure its finished yield, choose a repeatable portion, test a larger batch, and control changes. The goal is not to make your food feel factory-made. It is to give every customer the plate you intended while making purchasing, pricing, and prep easier to plan.
Start with the recipe your kitchen can actually repeat
A favorite home recipe is usually a memory: a little more seasoning, a different pan, and a taste-and-adjust finish. A production recipe has to tell another careful cook exactly what to use and do.
The USDA-backed recipe standardization guide defines a standardized recipe as one tried, adapted, and retried with the same result and yield when the exact procedures, equipment, and ingredient quantities and quality are used. Although written for school nutrition programs, its core principle fits a small plates business: the recipe is repeatable only under the conditions you tested.
Start with one regular dish that causes a real problem—perhaps the pan that runs short or the side whose portion keeps changing. A focused menu is easier to control, as the guide to starting a plates business with fewer dishes explains.
Choose the batch size you already make comfortably. If your usual equipment handles 12 portions well, standardize that batch before attempting 30. A clean small-batch record gives you something reliable to scale from.
Write down more than ingredients
The recipe card should remove choices from a busy service day. Record what another cook would need to reproduce your result without watching you.
Include:
- Menu name and recipe version
- Target batch size and intended number of portions
- Exact ingredient name, brand or specification, and preparation state
- Amount of every ingredient in a named unit of weight or volume
- Pan, pot, mixer, burner, oven setting, and other equipment used
- Preparation order, cut size, mixing method, and rest times
- Cooking steps and the time-and-temperature controls required for your operation
- Finished batch yield by weight or volume
- Portion size and the exact scale, scoop, ladle, or cutting pattern used
- Allergen notes, approved substitutions, and storage or holding instructions
The University of Nevada, Reno Extension overview stresses that a recipe is standardized for a particular operation. It may behave differently with another oven, pan depth, or mixer, so name the equipment precisely.
Replace “one bag,” “one can,” and “a handful” with the amount actually used. Record ingredients as prepared: for example, “1,200 grams yellow onion, peeled and diced to 1/4 inch,” not simply “onions.” This makes a supplier change visible.
Measure a finished batch before choosing the portion
Do not decide that a pot makes 30 servings because 30 containers are waiting. First find out what the tested batch really produces.
Use this routine:
- Weigh the empty finished-food container or pot and record its tare weight.
- Prepare the recipe exactly as written with your usual equipment.
- Weigh or measure the completed usable food, excluding the container.
- Record anything that was not sellable, such as bone, excess cooking liquid, or damaged portions.
- Divide usable finished yield by the portion you intend to serve.
- Portion the full batch with the chosen tool and count what it actually produces.
Suppose a finished pan of stew contains 9,600 grams of usable food. At 320 grams per container, the calculated yield is 30 portions. Portion the entire test batch anyway; the calculation and physical count should agree before the yield goes on the recipe card.
Keep total yield and serving size as separate fields. The USDA guide says yield should describe the finished amount by weight or volume and the number of servings. That distinction lets you see whether the recipe changed or the portioning changed.
Match the portion tool to the food
Choose weight when accuracy matters most or food settles unevenly. Choose volume when the product portions consistently. Pieces, such as one cornbread square, still need a size or cutting standard.
The USDA Food Buying Guide’s portion-control resource explains that standardized scoops, ladles, and measuring-serving spoons can produce repeatable volume portions when filled consistently. It also notes that the number on a disher tells you how many level scoops make one quart: a higher number means a smaller scoop.
Label the tool on the recipe and, if useful, with colored tape in the kitchen. Write “one level No. 8 disher” or “one 6-fluid-ounce ladle,” not “one scoop.” Fluid ounces describe volume; ounces on a scale describe weight. They are not interchangeable. Oklahoma State University Extension identifies confusing those units as a common scale-up error.
During a test, weigh several portions from the chosen tool. If they vary, tighten the filling method or use a scale. On sale day, weigh the first few portions and an occasional later one to catch drift.
Scale the recipe, then test the new batch
Use a conversion factor as a starting calculation:
Desired yield ÷ tested yield = conversion factor
If a tested recipe makes 12 portions and you need 30, the factor is 2.5. Multiply every measured ingredient by 2.5 and keep units consistent. Then treat that larger formula as a test, not a promise.
Food does not always scale in a straight line. Oklahoma State’s scale-up guidance explains that vessel size changes mixing and heating behavior, while ingredients can produce different flavor, texture, aroma, or appearance in a larger batch. The University of Minnesota Extension quantity-cooking guidance similarly warns that small recipes—especially baked foods and recipes with thickeners—may become disproportionate when simply multiplied.
Before accepting orders for the new yield, ask:
- Does the pot, pan, mixer, oven, refrigerator, and hot-holding setup have enough usable capacity?
- Can the batch be stirred, heated, cooled, held, and portioned using the approved process?
- Did cooking time, moisture loss, browning, or texture change?
- Did the finished weight and portion count match the target?
- Would two tested smaller batches produce a better result than one oversized batch?
Never adjust a safety-critical process just to make the scaled batch fit your schedule. Confirm current cooking, cooling, holding, labeling, and permitted-process requirements with the authority responsible for your operation.
Run three trials and record the differences
One good batch is a draft. The USDA school-nutrition guide uses at least three consistent preparations in its definition. That is not a legal rule for plate sellers, but it is a strong evidence threshold to borrow.
For each trial, record:
- Ingredient brands, lot or package changes, and measured amounts
- Person preparing the recipe
- Equipment and batch size
- Start, finish, and active-labor times
- Finished yield and number of correct portions
- Quality notes for flavor, texture, appearance, and travel
- Any deviations and the exact correction proposed
Change one variable at a time. If trial one is too salty, adjust the salt for trial two but keep the pan, liquid, batch size, and cooking method stable. If you change everything, you will not know what fixed the result.
After three acceptable trials, approve one version and date it. Keep the trial notes instead of overwriting them; they explain why the approved quantities exist.
Connect the yield to orders, cost, and waste
A verified yield turns a recipe into an operating tool. If one batch reliably makes 20 portions and you have 38 paid orders, you can plan two batches and decide intentionally what the two-portion difference means. That is more useful than cooking until the pots look full.
Use the approved recipe to:
- Build a purchase list from measured ingredient quantities
- Calculate ingredient cost per finished portion
- Reserve equipment and refrigerator space by batch
- Assign prep and cooking times
- Set an order cap the kitchen can fulfill consistently
- Compare expected yield with actual yield after service
The guide to pricing food plates for profit shows where ingredient, packaging, labor, overhead, and profit belong in the price. Your standardized recipe supplies the dependable ingredient quantity and portion count behind that math. The food-waste tracking workflow then helps you investigate when actual yield, paid orders, and leftovers do not match the plan.
Do not hide unexplained shortages by shrinking the last portions. Record the variance. It may point to inconsistent trimming, a supplier change, excessive cooking loss, the wrong tool, or unrecorded tasting and spills.
Control every recipe change
Put a version number and approval date on the recipe. When an ingredient, brand, package, portion, piece of equipment, or method changes, make a new test version. Do not erase the old card and assume the yield stays the same.
Check ingredient and allergen information again whenever a product changes. The safer workflow for handling food-allergy orders explains why a similar-looking replacement cannot inherit the old ingredient record automatically.
Before approving the revised recipe, confirm:
- The ingredient list and preparation steps are complete.
- The equipment and portion tool are named precisely.
- Finished weight, serving size, and portion count agree.
- The target batch has produced an acceptable result repeatedly.
- Costing, purchasing, allergen, label, and safety records use the same version.
Start with the menu item whose yield causes the most uncertainty. Write the batch exactly as you make it, weigh the finished food, portion the whole test, and record what remains. Repeat until three trials agree. Once the recipe can tell you how many consistent plates it produces, the order cap, shopping list, price, and prep plan all have a number they can trust.
Ready to move?
Turn the research phase into your first sale.
The guide brings pricing, menu planning, marketing, and setup into one clear playbook.
Get the guide on Gumroad